Sunday, November 27, 2011

New Audio Amplifier


After trying out several low power, low cost amps, I've decided to use the Sure Electronics
2x25W, TPA3123 Class-D Audio Amplifier Board.

The Sure Electronics Class-D dual channel amplifier board employs a Tripath-style Texas Instruments TPA3123D2 chip. Each channel is rated at 25W, delivered with state-of-the-art sound quality:

Pre-assembled, pre-tested
Superb sound quality
Perfect Class-D architecture
Two channels—each up to 25W
Up to 92% efficiency
Does not require a heat sink for most applications
Line level analog audio input

All for around $25!

(Sure Electronics p/n AA-AB018)
Saturday, November 26, 2011

OT: Look What I Did!


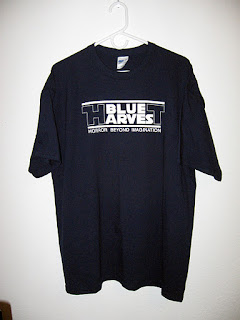
Note: As one observant collector pointed out... "HARVEST" should be in Outline Font:


Rev. 2 coming soon...

OK... Not R2 related, but Star Wars related nonetheless...

Here's my most recent "project"... a re-production of the now (in) famous Star Wars Pre-Production Crew Tee.

You know the one...

And yes, I am considering doing a run of these "Prop Replica" T-Shirts.

Friday, November 18, 2011

MP3 Trigger v2


The experiment continues...

This time I'm taking a look at Robertsonics MP3 Trigger.  This is a low-cost, low power embedded MP3 Player. The board has 18 external trigger pins that will directly trigger pre-selected MP3 tracks, and a full-duplex serial control port that provides full transport control, remote triggering for up to 256 tracks, and fast real-time volume control. The board plays the MP3 files directly from a FAT16 microSD flash card and supports 192Kbps stereo playback. There is also an on-board navigation switch for local access and playback of all MP3 tracks on the flash card.

The board uses a Cypress PSoC CY8C29466-24SXI microcontroller and a VLSI VS1053 audio codec.

Monday, November 14, 2011

Interactive Voice Control, Part 2


Interactive Voice Control
Basic Functions: Audio Section

I now have the Audio Section up and running... I'm using Rob's IVC board as described below and driving a Mono Amplifier based on the TDA2030 8 Watt IC Amplifier.  This is an excellent amplifier - it runs off of 12VDC, has a 94 dBA signal/noise ratio and a 20Hz to 20kHz frequency response, all in a small, low cost package.  This I've connected to a Pioneer TS-A878 3.5" 2-way Speaker.

 The audio section consists of a set of screw terminals for the audio input and output. The inputs feed a simple 1:1 modem isolation transformer after passing through a 10K trimmer pot/voltage divider circuit. This allows for some adjustment of impedance to ensure compatibility with whatever audio amplifier is connected to the output side.  The Hasbro speaker sounds are designed to drive an 8 ohm speaker and are not suitable for direct connection to an external amplifier without some sort of level and impedance matching circuit.


Friday, November 11, 2011

Interactive Voice Control


Interactive Voice Control
Basic Functions: Power Supply

I've started work on Rob Meyer's Interactive Voice Control board... I've got the Power Supply section running, which replaces the four D-Cell batteries, the four AA-Cell batteries and the power switch on the Hasbro Droid.

The IVC board's power supply section is designed as to replicate the original battery system, allowing the new system to operate on 12V Astromech power.

Here I'm running a 12V, 6A Benchtop Power Supply, which powers Dan Stuettgen's Power Distribution Board.  That in turn supplies 12V to Rob's Interactive Voice Control board, which distributes the various voltages to the Hasbro system.

-Dave
11.11.11

\m/ \m/

Tuesday, November 8, 2011

Battery Boxes


Just received my set of PVC Battery Boxes from Matt McCormick.

Nice work, Matt!

These are sturdy, clean, almost ready to paint Battery Boxes constructed of PVC pipe and expanded cell PVC board (aka Sintra). They are built to club specs with one small exception: the overall width of the boxes is about 2.87” (instead of 3”).

R2 in progress, part 7

R2 as of 11.08.2011.

Note the new PVC Battery Boxes.  Niiice.

Dome Drive Assembly


This week I "upgraded" my Dome Drive Assembly - I installed the Engraved Dome Drive Wheel from C5 Orlando 2010, offered by Guy Averett.

As far as the Dome drive Assembly, I took a slightly different approach:

I inverted the Drive Brackets so I could use the longer shaft version Pittman motor.  With the short shaft version, I wasn't able to mount the drive wheel low enough to install the Dome Plate.  With this setup, there's no need to cut down the longer shaft Pittman Motor, and the drive wheel now sits low enough to allow the Dome Riser Plate to be installed.

Drive mounting brackets are custom CNC machined, based on JAG's Dome Drive Assembly drawings.