 |
| Part No. BH-001-V2 |
 |
| Part No. BH-002-V1 |
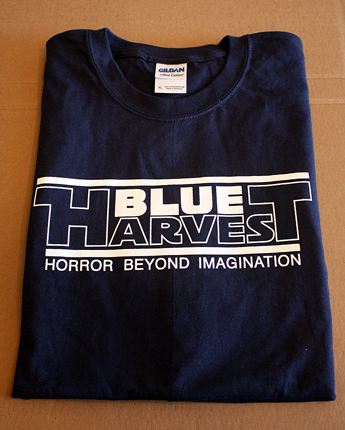
Here they are, Just in time for the New Year... my RPF Blue Harvest T-shirts!
Here we have reproductions of both the Classic 1982 Blue Harvest T-Shirt, as well as the 1996 Retro Blue Harvest Special Edition T-Shirt.
I'm considering doing a run of these Replica Prop T-Shirts... If you are interested please drop me an e-mail and let me know which design you'd like, along with your size and quantity desired
. Prices are TBD. My email address is:
dse1138@sonic.net
Shirts should be available in standard sizes: S, M, L, XL & XXL. Also please note your ship to location (Zip or Country Code is fine).
This run is PRELIMINARY and in the INTEREST ONLY phase. There is no merchandise available, and I am not accepting any payments at this time.
I'll be posting an "Official" announcement on therpf.com as this run progresses.
Thanks!
Dave
___________________________________________________________________________
A little history on Blue Harvest Memorabilia:
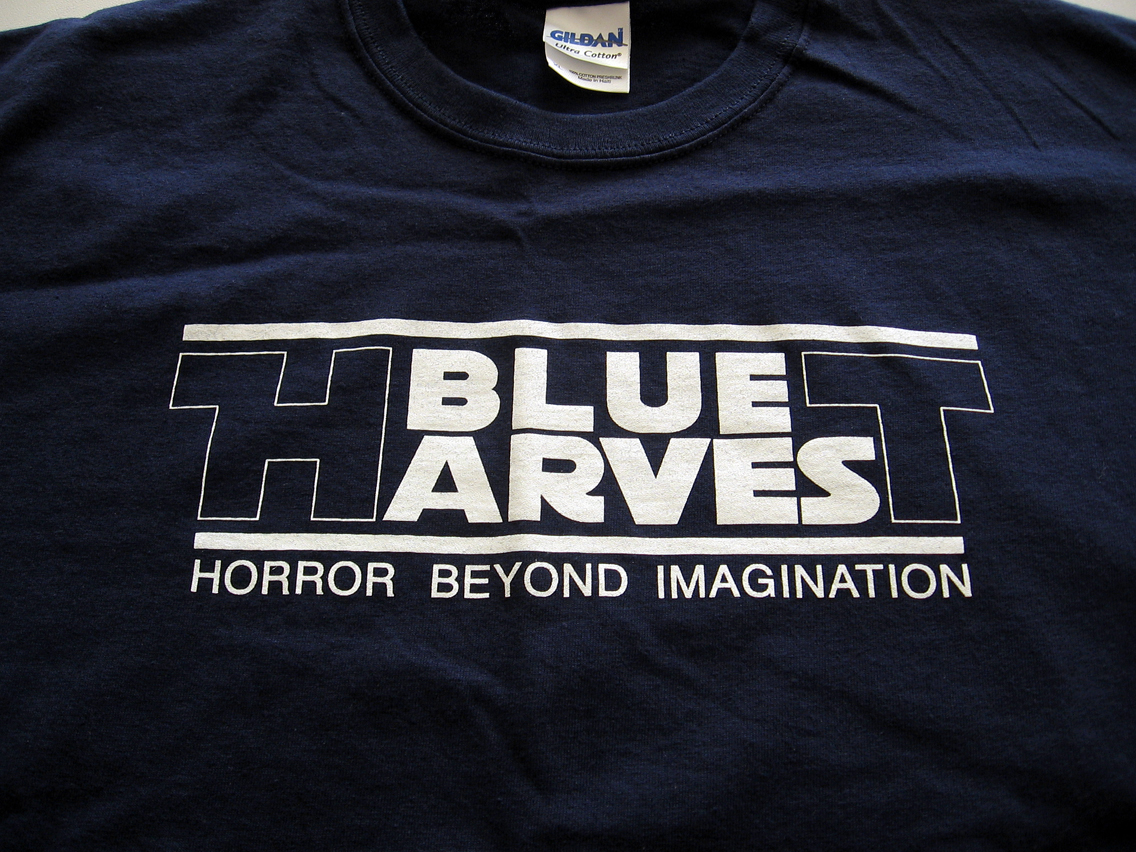
Blue Harvest T-Shirt
These were worn by the cast and crew of what was then titled Revenge of the Jedi. The crew pretended to be filming a horror movie, Blue Harvest, to reduce the amount of unwanted fan attention. Horror Beyond Imagination was the imaginary slogan for the film.
Retro Blue Harvest Special Edition T-shirt.
This is a recent cast and crew shirt from the team putting together the Star Wars Special Edition movies. It's a nod to the classic Blue Harvest and the logos of the two are identical. Although this shirt says "More Horror Beyond Imagination, Again" and "The Really Big Special Edition".


